Friday, May 28, 2010

~The Long Weekend~


I am taking the weekend off! Enjoy your holiday plans, no matter where you are or who you will be with!


See you next week for some more inspiration, ideas and ...


Enjoy!

Thursday, May 27, 2010

~Getting to Know Me~

So here is another week of getting to know me...
The questions..


1. Do you have a fetish? No


2. Do you sing in the shower? Sometimes


3. Who was your first crush? Curtis Gates - Kindergarten


4. What do you think is the best manly trait a guy could have? Acting tough but being a teddy bear


5. Do you sleep naked? No


6. What do you do when (you think) no one is looking? Fiddle with my earrings


7. What's the first thing you do when you go online? Check my email


8. Summer is.....? The best time for me, I don't like the cold..it means flip flops and sitting outside!

Wow, my answers are a bit boring this time around!  Maybe next time will be a little more exciting!  Hope everyone has a great day!

Hugs!

Wednesday, May 26, 2010

~Kitchens, Kitchens~


Well, here it is…another kitchen post. I had an email the other day from a friend asking me about kitchen islands and what to do if your kitchen is not big enough for a large island. I started looking at different things for her and starting daydreaming again! Sigh…


I love kitchens! It’s the one room in the house where items that are used everyday can be used as décor! Let’s take a quick peek at some of the great photos I found, hope they inspire you like they do me!

As the sign reads, BLISS! 


Love this, the farmhouse sink...it's a must!


Oh my gosh, look at these stools...and the chippy white paint on the island!


Look at the old school desk...what child or grandchild wouldn't love to eat here?


This is what started the daydreaming of kitchens again!


Open shelves, antique sign and that farmhouse sink...sigh!


There is not anything I DON"T love about this cabinet.  Such a beautiful piece!


And this little beauty...she is where the daydreaming went to plans on paper!  Isn't she to die for??

I hope you all have very blessed day!

HUGS!

Tuesday, May 25, 2010

~Fun with Clay Pots!~


It's no secret, I love gardening! I love flowers, I could spend all day walking through a garden center getting ideas...maybe it's the fact that my grandmother loved flowers too. She loved them so much that my dad and 2 aunts were basically named after flowers. My beloved Aunt Pansy (she is gone now, but when I'm in my garden I feel like she is still here in spirit!). My Aunt Ruth Violet. Then there is my dad, Jesse William, William comes from the Sweet William. I do have these three favorites in my gardens! Anywho, I wanted to share a little about clay pots and the fun you can have decorating with them and at the end, give you a little tutorial on how to do a Tipsy Pot Stand. Hope you all enjoy!


Alittle chalkboard paint and you can have your spice garden on your kitchen window sill or a table on the back porch!


Same idea, no chalkboard paint? Use a permanent magic marker!


Your basic painted pot, so pretty!


White washed, with little bands of the natural clay peeking out!  This is my all time favorite!


Now this is great, stacked pots and a base for a bird bath, your feathered friends would love you!
How pretty would this be to add some white washed paint and a little moss for that old worn look?


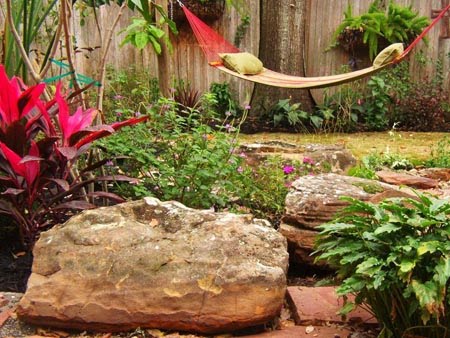
Now this sitting area making me swoon! The pansies in a blue pots against a white backdrop. Adding in the little details like playing up the blue trim on the window and blue curtains, makes me want to go sit a while, sip some tea and enjoy!


And finally the tipsy pot plant stand!  Any questions, let me know...

Step 1 - Prepare the site
First you need to clear a spot in your garden. Remove the sod and pound in a 66" long piece of 1/2" diameter re-rod (re-bar) into the soil at least two feet. This is very important for stability as the pots being stacked on it will be heavy with soil, water and plants. Surround the area with black/white newspaper to help block any weeds that might come up through the mulch.

Step - 2 Start Stacking
Place a 12" round clay pot at the base of the re-bar, threading the rod through the drainage hole in the pot. Fill the pot with potting mix, leaving an inch or two at the top and water it in. I like to take a good sized rock to put in the "side" of the pot to help stabilize before putting in the potting soil.
Step 3 - Continue Stacking
Slide a 10" clay pot over the rod in the same manner and tilt it on its side. The bottom will be resting on the soil. Fill pot with clay soil leaving at least two inches at the top.

Step 4 - Finish Stacking and Plant
Continue stacking 10" pots on the rod alternating the way they lean until you run out of rod. We were able to use five pots based on their size and the length of the rod we started with. I would not recommend going any higher than this as it will be hard to water and the tower could become unstable. Now you are ready to plant the pots.

Step 5 - Finished
Once planted, your tower will look something like this. You may need to add a little more soil around each plant as you are putting them in, but leave at least an inch at the top of each pot so that when you water, the water does not run out too fast. You can mulch the pots to help prevent this. To water, start at the top and water slowly. Pour the water on until it starts to run out. Stop watering that pot and go to the next. Continue until all pots have been watered. Weight several minutes than repeat the process. Clay pots tend to dry out quickly, so you can slow this down by sealing or painting them and lining the inside of the pots with newspaper. You can also use those water absorbing crystals in your potting mix. This tower may need to be water twice a day if you have temps in the 90s or more.

 Have a beautiful day!
Hugs...


Thursday, May 20, 2010

~Entryway Eye Candy~


Well, as of late my posts have been a little scattered! I have been busy working on the house, trying to get some unfinished projects done since I have a little time. I have not completed one full project in the last few weeks. I find myself jumping from here and there. I need to focus! In the meantime, I wanted to share a little entryway eye candy with you all! These are some wonderful ideas for the entryway in your home...hope you enjoy!


I love benches! Don't they make you swoon!
Look at the baskets underneath for some great added storage!

Now this is what I need in my entry...Storage and Organization! Love, love, love this!


This is really not my style, but I love how the table was repurposed and "hung" on the wall! What a great idea!


Another great bench! This entry is amazing! look at the detail, mostly nature inspired!
Later I give yu a little peek at this house, it really is inspiring!

Well, I hope you all have a wonderful day and I will catch up with you some more tomorrow!
 Until then... ~Hugs~

Monday, May 17, 2010

~some Yard Work Finally Getting Done~


Well, it's been a while since I posted last. We have been busy (when it's not been raining or snowing), working hard on the yard. Here are some before and after pictures of the front flower beds. Still some work to do and try to be PATIENT while everything comes up and fills in. Patience is not my virtue!


This is the bed in our front yard by the street.  Before...


After...


These little beds next to the porch get only annuals, they add so much color!


There is still so much work to be done on the front yard, like GRASS! There will be hanging baskets and plants in the pots on the front porch but I am waiting a little on the weather. I really am most excited about...having a full lawn.


When we moved in, the front yard looked so much different. No porch or sidewalk. There was a little "putting green in the front yard with one big Christmas tree and 3 evergreen shrubs, the rest was red rock. Oh how I hated the rock! It seems like it took us forever to dig it up. The porch and sidewalk are brand new last year as well as the planters.


There has been plenty of work going on in the back yard also. John has been hard at work getting a "new" bed under our crabapple tree. I will give you a little peek this next weekend. In the meantime, there is plenty of work going on inside as well!

Wednesday, May 12, 2010

~Daphne Nicole Purse Giveaway~

I happend accross a blog today with a GREAT giveaway!  
She is having her first giveaway to celebrate Opening her web site: Daphne Nicole on line Boutique.
Stop by and check out her blog as well as her new Boutique, I think you will love looking at her wonderful purses!
You will find the link over on the right side under my Etsy...Have fun checkin' her items out!

~Good Morning~

Well this week has certainly gotten away from me! I did not get the pictures posted Monday of the yard work in progress! I was down with a migraine and then yesterday had to prepare the gardens for freezing temps and snow! They are all covered with blankets now. I promise though I will get pictures up by the weekend (when we can uncover them)! I have also been working hard on an inside project...I am redoing the Master Bedroom. Not too many changes, new paint and accessories. Pictures will be forthcoming on that project also! Hope you all had a wonderful Mothers Day and I will be better with my updates!


Here are a couple of inspiration photos for my Master Bedroom…

I love, love, love this room...
This bedroom belongs to MySweetSavannah

This is a favorite also...Look at the striped dressers next to the bed!
Is bedroom belongs to JustBeachy...

Friday, May 7, 2010

~Long Week and Longer Weekend~

It has been pretty quite here in blog land for me! John and I have a project going and Sunday will be the big unveiling. This summer is our yard transformation year! We have pretty good bones in both the front and back yards but are always changing things up.


On our to do list for this year:


Front Yard - Tree In (check)


New Plantings around both tress


New Planting in with the Hydrangeas


Easy Breezy Summer Tropical Vibe


Back Yard - Re-do the beds around the trees


Re-Face Shed


Water Feature


Re-Arrange Plantings


Stain Arbor


Work on Patio and Outdoor Kitchen


Love This but would rather have...


Wouldn't the outdoor table look great here?

Love this...it speaks for itself...

And this, just for the hubby...he does so much work around here!

 So, which project will you see this weekend??
Check back Sunday evening or Monday morning to find out what project got done, I will have before and after photos!
Have a great weekend and may you be inspired by someone or something around you!
Hugs...

Wednesday, May 5, 2010

Living a Repurposed Life

Today I'm sharing a few pictures of some clever repurposed items. I hope you enjoy and I hope that it sparks a vision in your mind as to what you can do with that old...

WOOD BOWLS...
Feet on an old crate, what a cute new storage solution for your entry, kitchen, mud porch...


PICNIC TABLE BENCHES...

A set of 3 stacked and secured together to make a great side table. Wouldn't this be nice next to that cozy chair you sit and read in?

SUITCASE..
Add some store bought furniture legs and a cushy pillow and your best friend has a new bed. Won't your cat love you for this one??

THE OLD DRESSER...
There have been many posts on what to do with an old dresser, this one is very clever and I would have never thought of it...An old dresser tuned into a small space garden, perfect for a small porch or even in the kitchen or mudroom for your veggies or herbs! Line the drawers with plastic and attach, fill with dirt and add your plants. Great for herbs or small flowers...


AN OLD SIDE TABLE...
This is my favorite, an old side table turned doggy bed. Featured in Flea Market Style Magazine, check out their blog : http://fleamarketstylemag.blogspot.com The magazine is a must have if you are into repurposing and reusing!

I hope this inspires you to think "outside" the box when it comes to decorating. If you have anything clever you would like to share, leave me a comment, I'd love to hear or see your ideas! Have a wonderful day!

Hugs!

Monday, May 3, 2010

~A Wonderful Treat for the Family~

This recipe has been passed down to me through multiple generations of our family. This is a favorite of my family and so easy to make! This was one of the "treats" that my grandmother made for her children during the great depression. I hope you enjoy!


Poor Man's Cookies


2¼ cups water

1½ cups raisins

1 stick (8 tablespoons) unsalted butter

3 cups all-purpose flour

½ teaspoon salt

1½ teaspoons baking soda

¾ teaspoons baking powder

1½ cups sugar

½ teaspoon cinnamon

½ teaspoon nutmeg

½ teaspoon cloves

2 eggs, slightly beaten


1. Preheat the oven to 375°F and grease a 9×13 baking pan.


2. Combine water, raisins, and butter in a medium saucepan. Boil over medium-high heat, covered, for 20 minutes. Remove from heat, remove the lid, and let cool for 5-10 minutes.


3. While the raisin mixture is boiling, combine the dry ingredients (through cloves) in a large bowl, whisking until thoroughly combined.


4. Pour the slightly cooled raisin mixture over the dry ingredients and stir with a spoon until mostly combined and moistened (the batter at this point will have the consistency of a paste). Add the beaten eggs and again stir with a spoon, until thoroughly combined.


5. Spread the batter into the prepared pan and bake for 25-30 minutes, until deeply browned and a toothpick inserted into the center comes out mostly clean.


6 Cool to room temperature and cut into squares and before serving. If not serving immediately, cover with plastic wrap to keep the cookies moist. Store leftovers in an airtight container at room temperature.

Enjoy!
Hugs..